

Quck answer
String lights are a popular choice for decorative lighting, but they can sometimes experience issues. To troubleshoot and repair string lights, follow these steps:
1. Check the power source: Ensure that the lights are properly plugged in and that the outlet is working. Replace any blown fuses or reset any tripped circuit breakers.
2. Inspect the bulbs: Examine each bulb to identify any burnt-out or broken ones. Replace them with new bulbs of the same wattage and type.
3. Test the connections: Check the wires and connectors for loose or damaged parts. Secure any loose connections and replace any faulty connectors.
4. Use a voltage tester: Test the voltage at various points along the string lights to identify any issues. If the voltage is inconsistent, there may be a problem with the wiring.
5. Repair or replace the wiring: If the wiring is damaged, repair it by stripping the insulation and reconnecting the wires. If the damage is extensive, consider replacing the entire string.
Remember to always follow safety precautions when working with electricity and consult a professional if you are unsure or uncomfortable with the repair process.
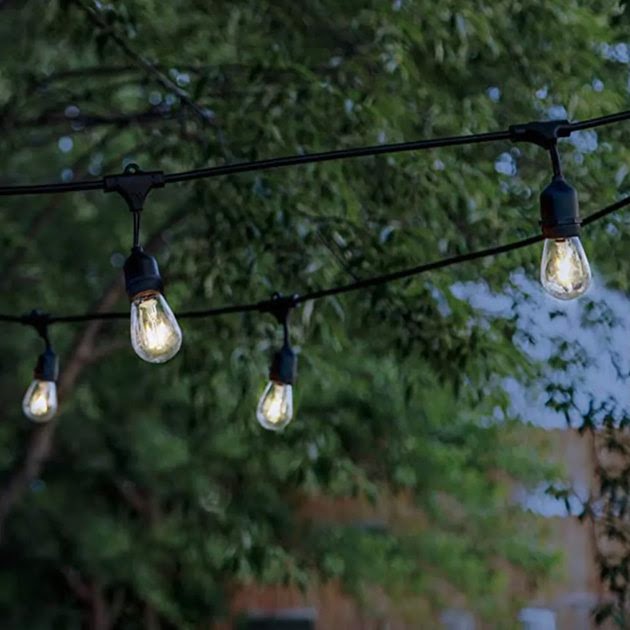
If you like to spend your evenings in your garden or patio, string lights can be a wonderful addition to your space. They offer just the right amount of light to see without being too bright, and they add a cozy and charming atmosphere to your outdoor area. However, if your string lights suddenly go dark, it can be frustrating. But, don’t worry! There are a few DIY troubleshooting tips that can help you figure out the problem and fix it easily. These tips work for all kinds of string lights, including holiday and Christmas lights.
How to Troubleshoot and Repair String Lights
Step 1: Check for Safety Hazards
Before you start troubleshooting and repairing your string lights, it’s important to check for any safety hazards. Critters like squirrels, mice, and rabbits may chew on wire coatings, leaving bare wires. If you see any damage or exposed wires, it’s better to throw your lights away and buy a new set. Broken wires are difficult to fix and can be dangerous to use.
If you live in a cold winter area, it’s a good idea to take down your string lights and store them during the winter. When you take them out in the spring, check for any wires that are broken or pulled away from the light sockets. If you notice any damage, it’s best to replace the lights rather than try to repair them.
Step 2: Check for Loose or Corroded Bulbs
When your string lights go dark, it’s possible that the problem may not be a big one. Sometimes, bulbs along the string may get knocked loose and stop working, causing other lights on the string to stop working as well. Before you start troubleshooting for bigger problems, check each bulb along your light strand and make sure it’s tightly seated in its socket. If you find any loose bulbs, push them back into place, and your lights may start working again.
If you have LED string lights, check for corrosion. Remove each LED bulb one at a time and check for rust or corrosion on the bottom of the bulb where the contacts are or inside the socket. If you find any corrosion, use sandpaper or a small wire brush to clean it away.

Image Credit: svetikd/iStock/GettyImages
Warning
Make sure to unplug the light string before inserting anything into a bulb socket.
Step 3: Replace the Fuses
String lights often have fuses inside the male plug end. To check the fuse, plug the broken lights into an electrical outlet that you know has power. Then, plug a working string of lights into the broken set. If the second strand of lights doesn’t light up either, the fuse is likely the issue.
If you have a problem with your string lights, the first step is to unplug them. To reach the fuses, look for the small door on the male plug end of the string. Insert a screwdriver into the plug’s indentation and slide the door open. Inside, you will find two tiny fuses that need to be replaced.
The fuses may be too small to remove by hand, so use a screwdriver to lift them out of their holders. Install new fuses, taking care to choose the correct size. Mini lights usually require 3-amp fuses, commercial grade strings need 5-amp fuses, and C-sets require 7-amp fuses. C-sets have larger, cone-shaped bulbs like those found in decorative window candle lights.
Be cautious when replacing fuses. Ensure that the new fuses have the same amp rating as the originals and match the rating printed on the plug or string label. Using a fuse with a higher amp rating than the light string is dangerous and can cause a fire.
If half of your light strand is dark, a damaged shunt may be the cause. Shunts are small wires located in each light bulb that redirect the electrical current when a bulb goes out. If a shunt fails, every light after the damaged area can go dark.
To fix a damaged shunt, remove any non-functioning bulbs and place the empty socket in a Christmas light repair tool’s port. Pull the trigger several times to send a current through the shunt to reactivate it. You may have to perform this action multiple times, up to 30, before it works.
Shunts allow electricity to bypass broken bulbs but do not decrease the amount of electricity flowing through the wires. This extra power is dispersed among the remaining bulbs, making them shine brighter. Although the change in light intensity is minor, it can shorten the life span of the bulbs. Replace any bad bulbs as soon as possible, even after repairing the shunt.

Image Credit:
svetikd/iStock/GettyImages
Step 5: Replacing Burned-Out Bulbs on String Lights
If your string light set is connected in series (as many are), a single burned-out light bulb can cause your entire light string to go dark. To resolve the issue, you must trace the circuit to identify where it is broken. Finding the break in your electrical circuit may sound complicated, but it is quite simple. Use a Christmas light repair tool or a non-contact voltage tester to check each light bulb individually.
To do this, plug in the lights and then hold your chosen tool close to or against each bulb one at a time. The tool will beep or light up where electrical current is present. If your tester finds no current in a specific bulb, replace that bulb or the one before it on the string.
If you don’t have a tester, you can also find faulty bulbs manually. This involves removing each bulb and replacing it with another until you find the correct one and the lights turn on. This method is tedious but effective.
If you have LED lights, you need to test them differently. In this case, you’ll need a Christmas tree light repair tool. You can remove the LED bulb from its socket and place it in the light tester. If it lights up, the bulb is functional. If it doesn’t, you’ll need to replace the bulb.
If a bulb goes out on LED lights that do not have removable bulbs, the safest option is to discard the lights and replace them. Attempting to repair any electrical device can cause electric shock or create a fire hazard. If your bulbs were not designed to be replaced, do not attempt to fix them.
Shop for String Light Replacements

Brightech Ambience Pro Waterproof Outdoor String Lights
$39.99 at Walmart
These string lights have a vintage-inspired design and a length of 48 feet with 15 bulbs. You can connect up to eight strands end to end.

Terrain Solar Droplet Lantern Light String
$48.00 at Anthropologie
Charge these solar lights during the day and let them shine at night. These beautiful lantern bulbs are inspired by the lighting in the bazaars of Morocco.
Brightech Ambience Pro Solar Power Outdoor String Lights
$66.99 at Target
These elegant string lights are 27 feet long and powered by a battery that charges in direct or indirect sunlight. The bulbs shine for up to six hours on a full charge.

Pottery Barn Globe String Lights
$79.00+ at Pottery Barn
You can choose between 40 and 51 lights on a 50-foot span with these string lights. They offer ultimate illumination and create a great atmosphere.

Bulbrite Vintage String Light Kit
$100.00 at Lumens
These retro lights provide the perfect soft glow to any outdoor space. The cord is 48 feet long and includes 15 bulbs.

Pottery Barn Edison Bulb Indoor/Outdoor String Lights
$79.00+ at Pottery Barn
The elongated Edison bulbs create a cool backyard setting. The strand includes 20 vintage-looking lights.
FAQ
1. Why are my string lights not working?
There could be several reasons why your string lights are not working. First, check if the bulbs are properly inserted and screwed in. Sometimes, loose bulbs can cause the entire string to malfunction. If the bulbs are fine, the problem might be with the fuse. String lights usually have a fuse that can blow out if there is a power surge or overload. Replace the fuse if necessary. Additionally, check the power source. Ensure that the outlet or extension cord is functioning properly. If all else fails, it is possible that there is a wiring issue within the string lights themselves. In this case, it may be best to replace the entire set.
2. Why do my string lights keep flickering?
If your string lights are flickering, the first thing to check is the connection between the bulbs. Make sure they are securely screwed in and not loose. Loose connections can cause interruptions in the electrical flow, resulting in flickering lights. Another possible cause is a faulty bulb. Try replacing individual bulbs to see if the flickering stops. If the issue persists, it could be due to a problem with the power source. Check the outlet or extension cord for any loose connections or damage. It is also worth noting that some string lights have a built-in flicker effect for decorative purposes. Refer to the product manual to determine if this is the case.
3. How can I fix a broken wire in my string lights?
If you have a broken wire in your string lights, it is possible to repair it. Start by disconnecting the lights from the power source. Carefully remove the outer insulation covering the damaged section of the wire. Examine the wire to identify the break. Use a wire cutter to trim the wire ends to remove any frayed or damaged sections. Strip about half an inch of insulation from the ends of the wire. Twist the exposed wires together, making sure they are tightly connected. Wrap electrical tape around the exposed wires to secure them. Finally, cover the repaired section with electrical insulation tape. Reconnect the lights to the power source and test if they are working properly.